Friday 31 October 2008

Making a Glossy Card

Hi everyone!

Here's a nice and fun technique you can make using your stamping supplies. To make this project, you will need:

  • Cardstock in black, white, orange, and green
  • Adhesives & dimensionals
  • Scissors
  • Pencil
  • Versamark
  • Clear Embossing Powder
  • Heat Gun
  • Embellishments
Now let's start:

1.) First off you will need to download this pattern-->Halloween Fun<--. Cut out all pieces according to the instructions given EXCEPT FOR THE PUMPKIN.

2.) For the pumpkin I grabbed a pencil and drew the shape in one side of the orange cardstock and then folded the orange cardstock in half and cut out my shape, leaving the left side untouched. See the pic!


You should now have this:

3.) Now for the fun part :) Grab the black kitty shape and with the Versamark damp the entire shape (top only).

4.) Spread clear embossing powder on top, making sure it covers the shape entirely.

5.) With the heat gun melt the embossing powder on the shape.

Repeat steps #3, #4 & #5 for the remaining black pieces.

Nice technique, ha? And it looks gorgeous!

6.) While your shapes are cooling down, grab the pumpkin and decorate it. I chalked and stitched the edges. I also added a Prima leaf on top of it, but of course you can add whatever you like :)

7.) Adhere dimensionals on the back of your pumpkin and center it on top of the black cat shape.

8.) Now finish your card by adding eyes and nose to the cat and its paws. I used my circle punches (small & 1/4 size punches) to create the eyes... even better, you can add those wiggly eyes for a funner look.

And we are done! Here's how it should look on the inside:

For more of my projects and inspirational crafts, visit Papeles y Enredos.

HAPPY HALLOWEEN EVERYONE!

by: Yanitza Ramos

Glad Wrap Effect Cards

Everyone who knows me knows just how much I love playing with mixed media techniques, especially working with paints!! I recently found the idea of applying Glad Wrap to paint to distress and mute its appearance while blog hopping and just had to have a play, I've since changed the technique to suit my own personal style and wanted to share it with you. Here's my completed card -


Requirements –

Acrylic paint, a light and a dark shade and silver
Glad Wrap
Scrap of sequin scrap


1. Cut card to size and coat evenly with your darkest colour. Leave to dry thoroughly.


2. Squirt some of the lighter shade onto your painted piece of card. Don’t worry about being precise and exact as the paint will be moved around with the Glad Wrap.

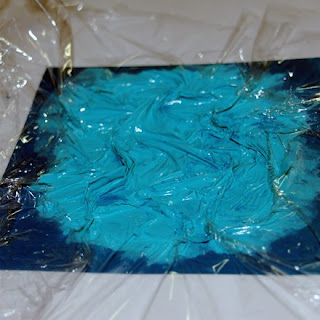
3. Tear of a piece of Glad Wrap large enough to cover the surface of your card piece and the edges by approximately 5 cm.


4. Scrunch the Glad Wrap onto the surface of the card. At this point any excess paint will gather into the folds of the Glad wrap. Leave to dry thoroughly.


5. Once dry, carefully remove the Glad Wrap. At this stage you will notice that where the paint fell into the folds of the Glad Wrap, the paint is thinner or absent.

6. Using the Sequin scrap and a balled up scrap of Glad wrap, sponge the silver paint over the sequin scrap to create a random patterning.


7. Allow the whole piece to dry thoroughly and then attach your embellishments to finish off your card. I chose to colour in a few stamped images then attached with dimensional foam tape. To create the white area for the stamped image I simply ran a Dry Whiteout tape.


Blog_signature_image_4

Monday 27 October 2008

3 Way Fold Card Tutorial

Hello Ladies, this is my first post on this great blog. I was excited to find Julie's email last night when I returned from work :)

This is one of my favourite cards to make so I thought I'd share it with you.

Here is the finished card and a view of how it opens.


now on to the directions. :)

3 Way Card Instructions:
The Finished Card is 4 1/4" x 4 1/4"


Cutting and Folding:


Assembling:


Now you're ready to embellish and add whatever you desire.
Have Fun.....!


Happy Carding!

Tamara

Sunday 26 October 2008

How to make your own designer brads !
By Maddy Hill .


These customised brads are just perfect for adding that special touch to co-ordinate with your layouts , cards or anything you wish to adorn .
Above i have co- ordinated mine with some heart ribbon. The ideas for these is only as limited as your imagination !


Step
1. Roll a ball of fimo in the colour of your choice , then flatten it by rolling with a hairspray can until it is a few mm thick.


make a Circle cutter heres how ...
2. Take an old pritt stick lid and pierce several holes next to each other in the top of it, , you could use a compass or a paper piercer. To make the hole bigger , press a sissor end into the hole and twist.

3. Take the end of a small thin paint brush and push this into the hole a little way. Then place your lid onto the fimo and twist, this will cut the clay into a circle. The fimo will now be stuck in the lid.
4. Push the end of the paint brush down into the lid gently ... this will release your fimo. ... Now you will have a circle just a little bigger than your jumbo brad. You can do this without cutting out a circle - but it is much harder to cut and easier to go wrong.


5. Using the pad your finger push the fimo around the edge slightly .Trim the excess fimo off the edge of the brad, trim inwards towards the prongs rather than outwards.

6.Press your brad gently onto a cuttlebug folder, if you dont have one of these you can press your brad into some lace or net.


7. For the hearts
1. roll a ball.. 2. roll this into a tear shape . 3 Flatten using the pad of your finger.


8. Trim the point to sharpen the bottom . Then use the blunt side of your knife to and push this into the middle at the top. Place on your fimo brad and gently press. If you wish you can use a toothpick or your knife to create stitch marks around the edge.
9. Ink the edge using a dye ink /chalk ink before baking.

And there you have it , your own customised designer brad !


Bake as per instructions on the packet of fimo / polymer clay.


Thanks
Maddy ....x